As spring awakens and nature's vibrant palette returns, there's a timeless sweet treat that perfectly captures the joy and whimsy of the season: birds nest cookies. These adorable no-bake confections, often associated with Easter, have charmed generations with their simple construction and delightful appearance. While many recall classic versions made with butterscotch or marshmallow-bound chow mein noodles, we're delving into a truly decadent realm: rich chocolate birds nest cookies that elevate this nostalgic favorite to a gourmet level. Imagine a symphony of chocolate, complemented by a subtle crunch, and crowned with colorful candy eggs – a treat so enchanting, it's perfect for gifting, celebrating, or simply savoring a sweet moment with loved ones.
The Irresistible Charm of Birds Nest Cookies
There's an undeniable allure to birds nest cookies that transcends their simple preparation. For many, they evoke cherished childhood memories, like the aroma of butterscotch melting on the stove or the excitement of pressing candies into freshly formed nests. These cookies are more than just a dessert; they're a miniature edible landscape, a testament to the beauty of spring's renewal. Their appeal lies in several key factors:
- Nostalgia: They often connect us to traditions and loved ones, whether it's a grandmother's secret recipe or a yearly Easter ritual.
- Ease of Preparation: Being a no-bake treat, they are incredibly accessible, making them ideal for busy schedules or budding young chefs. This ease also minimizes kitchen cleanup, a win for everyone!
- Kid-Friendly Fun: The process of mixing, forming, and decorating is inherently hands-on and creative, making them a fantastic activity to share with children. It’s a wonderful way to foster creativity and fine motor skills.
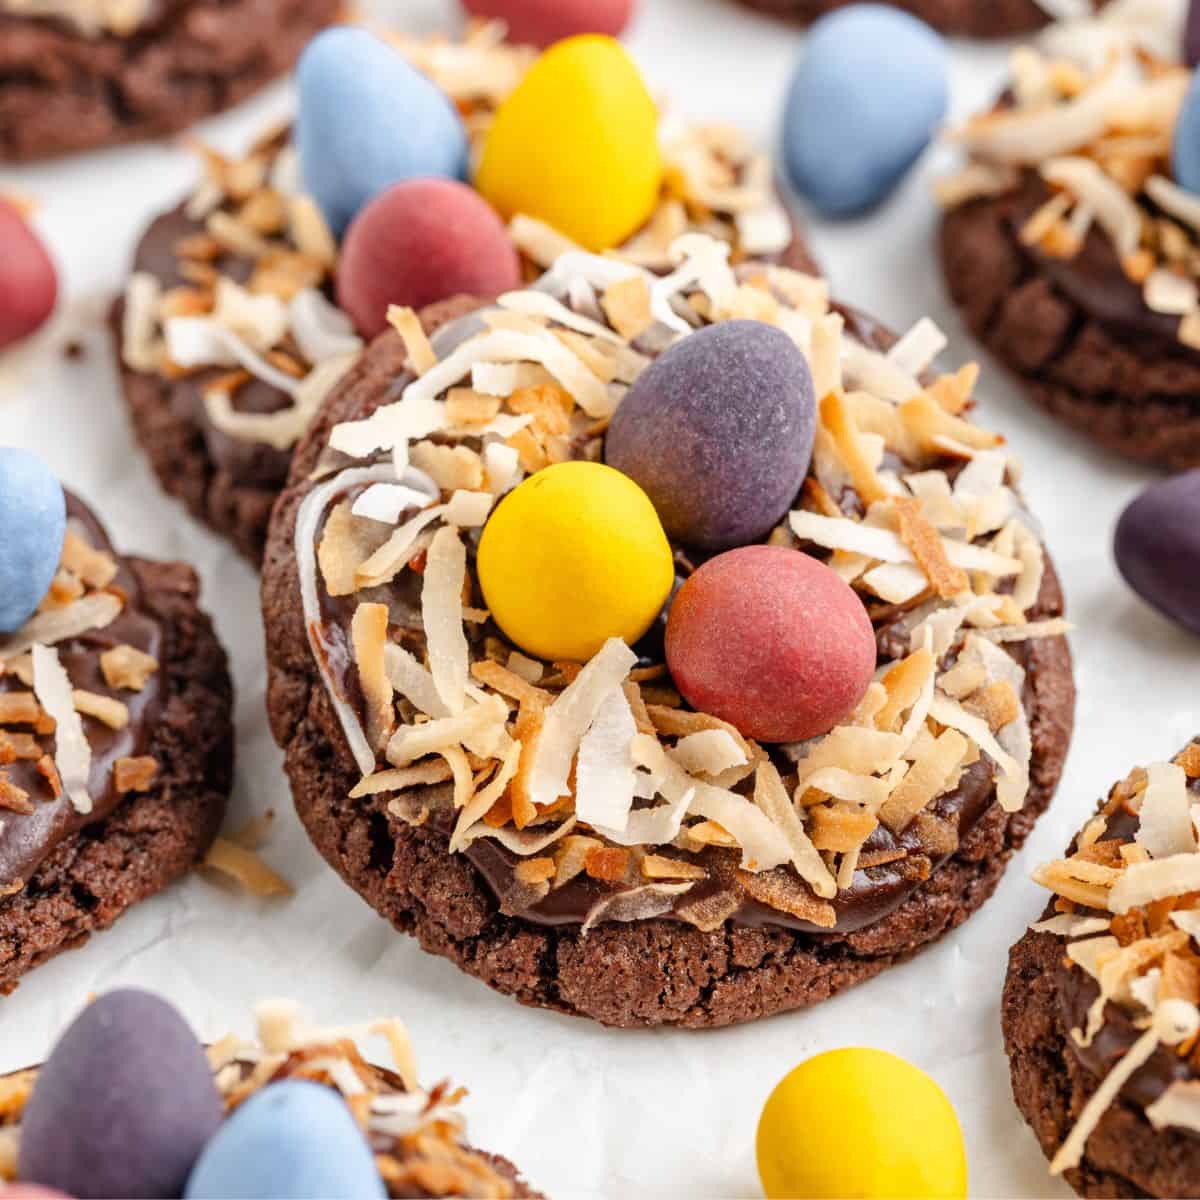
- Visual Appeal: Their charming, lifelike appearance, complete with "grass" and "eggs," makes them an instant centerpiece on any dessert platter, especially during spring festivities.
- Versatility: While traditionally tied to Easter, their spring theme makes them suitable for baby showers, garden parties, or simply a celebratory family gathering.
Beyond the sentiment, their simple structure allows for endless creativity, especially when it comes to the star ingredient: chocolate.
Crafting Your Decadent Chocolate Birds Nest Base
The foundation of any great birds nest cookie is its base. Traditionally, many recipes call for chow mein noodles, which offer a delightful savory-sweet crunch. However, for a truly decadent and slightly different texture, some prefer to use frosted flakes. This choice often comes down to personal preference for flavor and crunch profile. Chow Mein vs. Frosted Flakes: The Best Birds Nest Cookie Base is a debate worth exploring, but for our luxurious chocolate version, frosted flakes often provide a lighter, sweeter crunch that pairs exquisitely with rich chocolate.
The Triple Chocolate Blend
To achieve that "decadent chocolate" flavor, we move beyond a single type of chocolate. The magic happens when you combine different chocolate varieties, often with a hint of something extra to boost the richness. A sublime combination includes:
- Milk Chocolate Chips: For a creamy, sweet, and classic chocolate flavor.
- Semi-Sweet Chocolate Chips: To add depth and a slightly less sweet, more intense chocolate note, balancing the milk chocolate.
- Peanut Butter Chips: This is where the true decadence often lies. The nutty, salty-sweet profile of peanut butter chips elevates the chocolate, creating a flavor combination that's incredibly satisfying and utterly addictive.
This trio melts together into a glorious, shiny mixture that will perfectly bind your chosen crunchy base.
Mastering the Melt: Tips for Silky Smooth Chocolate
Melting chocolate can seem daunting, but with a few simple techniques, you'll achieve a smooth, glossy consistency every time. The microwave is a popular and efficient method:
- Choose the Right Bowl: Always use a microwave-safe bowl, preferably glass, which conducts heat evenly.
- Low and Slow is Key: Begin by microwaving the chocolate chips in 30-second intervals. After each interval, remove the bowl and stir thoroughly, even if the chocolate doesn't look fully melted. This distributes the heat and prevents scorching.
- Stir, Stir, Stir: Stirring is critical. It helps the chocolate melt evenly and become smooth and shiny. Continue microwaving and stirring in short bursts until the chocolate is mostly melted, then rely on residual heat to fully melt the remaining small chunks by stirring vigorously. This prevents overheating.
- Watch for Perfection: The chocolate is ready when it's completely smooth, shiny, and free of lumps. You do *not* want burnt chocolate; it will seize and become gritty. If you notice any signs of burning, unfortunately, there's no turning back.
- Alternative Method (Bain-Marie): If you prefer not to use a microwave, a double boiler (bain-marie) is an excellent alternative. Place your heat-safe bowl over a saucepan of simmering water, ensuring the bottom of the bowl does not touch the water. Stir continuously until melted. This method offers gentle, even heat, reducing the risk of burning.
Once your triple-chocolate blend is perfectly melted, gently fold in your frosted flakes (or chow mein noodles) until every piece is generously coated. This ensures each bite is a burst of chocolatey goodness.
Assembling Your Edible Nests: Tips for Perfection
With your chocolate-coated base ready, the next step is to transform this delicious mixture into recognizable nest shapes. This part is fun and offers another opportunity for creativity. Here’s how to ensure your nests are perfectly formed and sturdy:
- Preparation is Paramount: Line a cookie sheet or large platter with parchment paper or wax paper. This prevents sticking and makes for easy cleanup.
- Grease Your Hands: For marshmallow-based nests, generously coating your hands with shortening is a common trick. For chocolate nests, while shortening can still help, simply working quickly and accepting a little chocolate on your fingers is part of the fun! Alternatively, you can use lightly greased spoons or a cookie scoop.
- Portion Control: Grab a clump of the chocolate mixture. A good size guideline is something between a golf ball and a tennis ball – large enough to form a nest but not so big that it's difficult to handle. Aim for consistency in size for a uniform look.
- Forming the Nest: Gently roll the clump into a loose ball, then immediately press your thumbs into the center, creating an indentation. Shape the edges to form a distinct "nest" with a raised rim. Work quickly, as the chocolate will begin to set.
- Muffin Tin Trick: For perfectly uniform nests, lightly grease a muffin tin (mini or standard size) and press the chocolate mixture into each cup, creating the indentation with a spoon or your thumb. This method is great for achieving a consistent shape and allows them to set nicely.
- Cooling Time: Once all your nests are formed, allow them to cool completely. You can do this at room temperature, or if you're in a hurry, place the cookie sheet in the refrigerator for 15-20 minutes until the chocolate is firm. This step is crucial before filling, as it prevents the nests from collapsing.
Decorating Your Spring Masterpieces
This is where your birds nest cookies truly come alive and become the adorable, festive treats we know and love. The decorating process is immensely satisfying and allows for endless personalization.
- The "Eggs": The quintessential element! Whoppers Mini Robin Eggs are a popular choice, perfectly sized and pastel-colored. However, feel free to use your favorites:
- Mini M&M's (especially pastel-colored ones)
- Jelly beans (small sizes work best)
- Cadbury Mini Eggs
- Small malted milk balls
- Gummy candies shaped like eggs or chicks
- The "Grass" and Beyond: To enhance the natural nest look, green sprinkles are a fantastic addition. Jimmie-style green sprinkles or green sugar sprinkles can be lightly scattered around the "eggs" to resemble grass. But don't stop there!
- Colorful Sprinkles: Use other spring-themed sprinkles – pastel dots, flowers, or even edible glitter for an extra magical touch.
- Edible Flowers: Small, edible sugar flowers can add an elegant touch.
- Melted Chocolate Drizzle: A contrasting drizzle of white chocolate or dark chocolate can add visual interest.
- Personalization: Encourage kids (and adults!) to get creative. Each nest can be a unique work of art, reflecting individual tastes and imaginations.
Why These No-Bake Wonders Are Perfect for Any Occasion
While often spotlighted during Easter, the appeal of these easy no-bake birds nest cookies extends far beyond the holiday. Their delightful nature makes them a versatile treat for a variety of moments:
- Everyday Joy: Sometimes, you just need a quick, satisfying sweet treat. Their no-bake convenience means you can whip up a batch on a whim without heating up your kitchen.
- Thoughtful Gifts: Packaged in cute boxes or cello bags, these cookies make charming gifts for teachers, neighbors, or as party favors. They show a handmade touch that is always appreciated.
- Family Activities: As highlighted earlier, they are a fantastic family bonding activity. From melting chocolate to decorating, there are roles for all ages and skill levels, creating lasting memories alongside delicious cookies.
- Spring Celebrations: Beyond Easter, think Mother's Day brunches, garden parties, baby showers, or even just a picnic in the park. Their fresh, natural theme is perfect for any spring-themed gathering. They can even complement educational activities, like a study on birds or a nature hike.
- Dietary Considerations: While this recipe is for decadent chocolate, the no-bake nature often allows for easier adaptations for various dietary needs (e.g., gluten-free frosted flakes, dairy-free chocolate chips), making them inclusive for more guests.
The pure simplicity and universal appeal of these treats ensure they remain a beloved choice for any occasion where a touch of sweetness and charm is desired.
Decadent chocolate birds nest cookies are more than just a recipe; they are an invitation to create, share, and savor the sweet moments of spring. Whether you're rekindling cherished memories or starting new traditions, these charming no-bake wonders are guaranteed to bring smiles and delight. So gather your ingredients, unleash your creativity, and prepare to enchant your taste buds with these truly special spring treats. Happy baking (or rather, no-baking)!
